
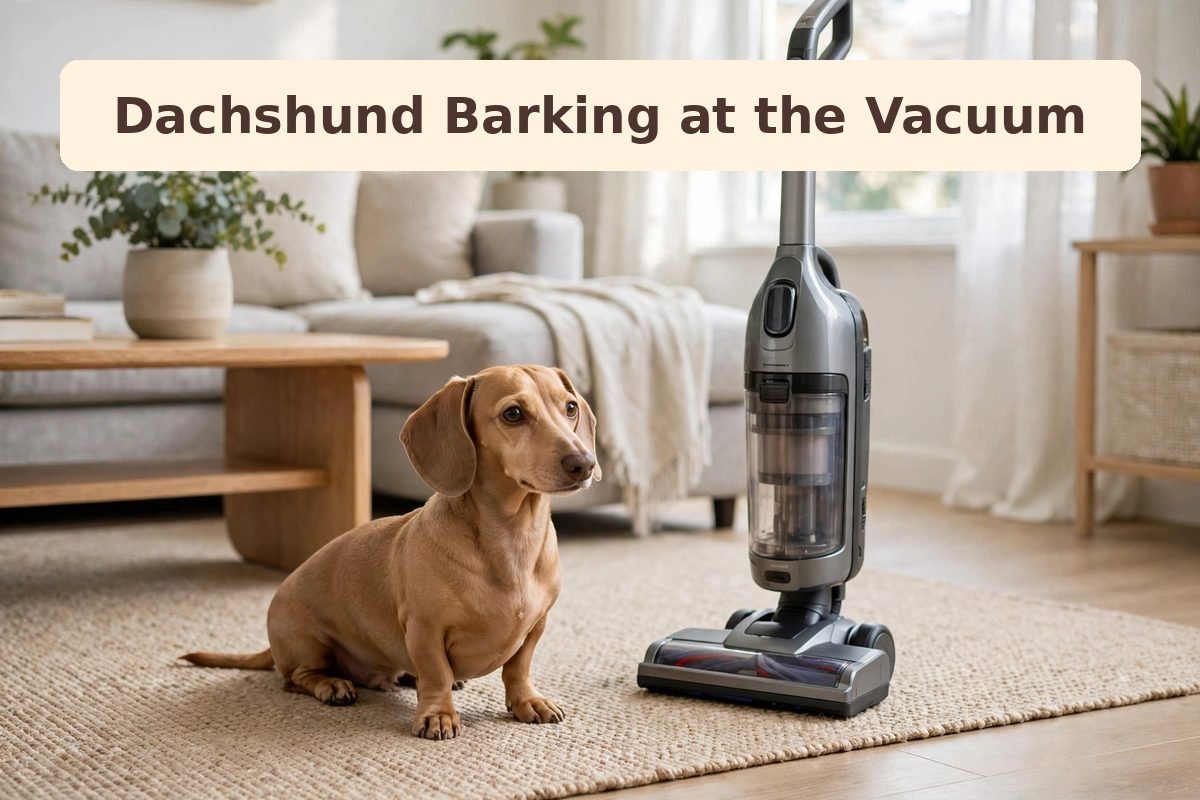
Dachshund Barking at Vacuum: Calm Appliance Routine
Quick Answer
- A Dachshund often barks at a vacuum because it is loud, moves unpredictably, and smells strange, which triggers the breed’s alert instinct.
- Start with the vacuum switched off and still, reward calm interest, and only add movement and sound in very small steps.
- During real cleaning, give the dog a settled mat in another room, a long-lasting chew, and a closed door between the dog and the vacuum.
- Short, calm sessions beat one long stressful clean, and progress is measured across weeks, not a single afternoon.
Contents
- 1. Why Vacuums and Appliances Trigger Barking
- 2. Start With the Vacuum Switched Off
- 3. Build Tolerance With Short, Controlled Sessions
- 4. Manage the Room While You Clean
- 5. A Weekly Routine That Keeps Barking Low
- Appliance Barking Response Checklist
- Common Mistakes
- When to Call Your Vet
- Pin This: Vacuum Calm Checklist
- Frequently Asked Questions
- Conclusion
The vacuum comes out of the cupboard, the motor starts, and a calm Dachshund turns into a barking, chasing, lunging dog within seconds. The scene is familiar to many apartment owners: the dog barks at the moving head, snaps at the wheels, follows it from room to room, and stays wound up long after the cleaning ends. It feels like defiance, but it is usually a mix of alert barking, fear of a loud moving object, and frustration at something the dog cannot control or investigate safely.
A vacuum is a difficult trigger because it combines several things dogs find alarming at once. It is noisy, it moves toward the dog and away again, it vibrates through the floor, and it changes the smell of the room by stirring up dust. In a small apartment there is also nowhere far to retreat, so the dog feels cornered by the noise. The good news is that vacuum barking responds well to a steady plan: slow introductions, a settled place to go, and cleaning routines that respect the dog’s limits. This guide covers all three, plus the same approach for other noisy appliances such as blenders, hair dryers, and washing machines.
1. Why Vacuums and Appliances Trigger Barking
Dachshunds were bred to alert and to investigate, and a vacuum gives them plenty to alert about. The motor produces a loud, high-pitched sound that is very different from everyday household noise, and it starts suddenly, which removes any chance to prepare. The machine then moves across the floor in a way that looks like an animal approaching: it advances, turns, backs up, and comes toward the dog again. For a dog that cannot work out what the object is or where it will go next, barking is a way of warning the household and pushing the strange thing away.
Fear often sits underneath the barking. A dog that barks while backing away, tucking its tail, flattening its ears, or trying to leave the room is frightened, not naughty. A dog that barks while lunging, snapping at the vacuum head, or chasing it is usually frustrated and overexcited, which is a different problem but needs the same calm approach. Either way, shouting over the barking or pushing the dog away tends to make things worse, because the dog hears raised voices on top of the noise and learns that vacuum time is chaotic for everyone.
Other appliances trigger the same reaction for the same reasons. A blender starts with a sudden loud whirr, a hair dryer blows hot air and noise at close range, and a washing machine vibrates and hums through the floor. A dog that reacts to one appliance often reacts to others, because the pattern is the same: sudden noise, vibration, and movement the dog cannot predict. The plan in this guide therefore works for the whole group, not just the vacuum, and progress with one appliance usually makes the next one easier.

2. Start With the Vacuum Switched Off
Begin when the vacuum is off, unplugged, and standing still in the middle of the room. Let the dog approach it on its own terms, on a loose lead or free in the room, while you stay nearby and calm. Reward any calm interest: a sniff, a look, a step toward it, or a decision to walk away and settle. Use small, soft treats the dog can eat quickly, and keep the session to three or four minutes. The aim is a simple lesson: the vacuum is a boring object that predicts good things, not a threat.
Repeat this for several days before the vacuum ever moves. Once the dog can walk past the still vacuum without barking, roll it slowly across the floor while it is still switched off, a short distance at a time, rewarding calm watching. Then leave it running in the next room with the door closed, so the dog hears the sound at a distance while eating a chew or resting on its mat. Only when the dog is relaxed at that distance should the vacuum come into the same room while running. Each step should feel easy for the dog; if barking returns, the step was too large, and the previous step needs more practice.
Use the same off-first approach for other appliances. Put the blender on the counter without switching it on, reward calm interest, and run it for one second, then two, then five, over several days. Let the dog see and sniff a switched-off hair dryer before it ever blows air. The plan for hallway sounds uses the same idea of distance and low intensity first, and its settle steps transfer directly to appliance practice. Short, easy sessions build a calm association far faster than one long session that ends in barking.
3. Build Tolerance With Short, Controlled Sessions
Once the dog can stay calm near a running vacuum at a distance, start short practice sessions in the same room. Ask a family member to run the vacuum slowly in one corner while you stay with the dog at the far end of the room, on its mat, with a long-lasting chew or a food puzzle. Keep the vacuum far away and moving slowly, and reward the dog every few seconds for staying settled. After two or three minutes, switch the vacuum off, praise the dog calmly, and end the session while the dog is still relaxed.
Increase the difficulty in one small way at a time: a little closer, a little longer, or a little faster, but never all three at once. If the dog barks, the session was too hard, and the next session should go back to the last easy level. Keep a simple note of the distance, the duration, and whether the dog barked, because that record shows whether the plan is working across weeks. Two or three short sessions a week are enough; daily sessions are fine if they stay short and calm, but a tired or stressed dog learns nothing from a forced session.
Pair the vacuum with something the dog enjoys. Scatter a few treats on the mat before the vacuum starts, so the sound predicts food arriving rather than chaos. Offer a stuffed chew that takes several minutes to finish, so the dog has an absorbing task while the noise continues. Avoid using the dog’s main meal as the reward for every session, because the dog still needs normal meals, but small high-value treats during practice are a fair trade for a difficult job. Over time, the dog may hear the vacuum start and walk to its mat on its own, because that place has a history of calm rewards.

4. Manage the Room While You Clean
Until the dog is genuinely comfortable, do not expect it to cope with a full cleaning session in the same room. Set the dog up for success instead: settle it on its mat in another room with a chew or puzzle, close the door, and vacuum the far rooms first. A closed door and a little distance lower the sound and remove the sight of the moving machine, which is often enough to prevent barking. Keep the session short, and let the dog out only after the vacuum is switched off and put away.
If the apartment is too small for a separate room, use a playpen or a gated area at the far end of the largest room, with the dog’s bed, water, and a chew inside. Vacuum the opposite end first, moving slowly and calmly, and avoid steering the vacuum directly toward the dog. Talk in a low, steady voice while you work, and pause if the dog starts barking: switch the vacuum off, wait for a calm moment, reward the settle, and then continue. Pausing is not giving in; it is teaching the dog that quiet brings the vacuum back under control.
Plan the cleaning itself to reduce triggers. Vacuum when the dog is already tired after a walk, not when it is full of energy and ready to react. Keep the first passes slow and predictable, in straight lines, rather than sudden turns toward the dog. Put the vacuum away as soon as the job is done, rather than leaving it standing in the room, because a parked vacuum can become a new thing to bark at. The calm plan for fireworks and loud noises shares the same safe-room idea, and its preparation steps work just as well on cleaning day.
5. A Weekly Routine That Keeps Barking Low
Vacuum barking improves fastest when practice and real cleaning follow a regular weekly pattern. Choose two or three days for short practice sessions, and keep real cleaning on days when the dog can be settled elsewhere. For example, practice on Monday and Thursday for three minutes each, and do the main vacuum on Saturday after a walk, with the dog settled in the bedroom. A predictable pattern helps the dog as much as it helps the owner, because the dog learns when to expect noise and what to do about it.
Review progress every two weeks. Note whether the dog barks less, recovers faster, or goes to its mat without being asked. Small improvements count: barking for thirty seconds instead of five minutes is real progress, even if the dog is not silent yet. If progress stalls for several weeks, check the basics: sessions may be too long, the distance too close, or the dog may be tired, unwell, or stressed by something else. A short break of a few days, followed by a return to an easier step, often restarts progress better than pushing harder.
Keep the routine going even after the barking improves. A dog that copes well for a month can slip back after a long break from practice, a new vacuum with a different sound, or a move to a new apartment. A short refresher session every week or two, with the same mat and chew routine, keeps the calm association strong. New appliances deserve the same slow introduction, one at a time, so the dog never faces two new noises in the same week. Steady, boring routines are what turn a barking dog into a dog that yawns when the vacuum starts.

Appliance Barking Response Checklist
| Appliance | First step | What to avoid |
|---|---|---|
| Vacuum cleaner | Switched off, still, rewarded sniffing | Steering it toward the dog on day one |
| Blender | On the counter, off, one-second runs | Running it at full speed beside the dog |
| Hair dryer | Switched off, sniffing, then low air at distance | Blowing hot air toward the dog’s face |
| Washing machine | Dog settled in another room during spin cycle | Forcing the dog to stay beside a vibrating machine |
| Any new appliance | Introduce one at a time, in small steps | Two new noises in the same week |
Common Mistakes
- Switching the vacuum on beside the dog on the first day.
- Shouting over the barking, which adds noise to noise.
- Chasing the dog away from the vacuum instead of settling it on a mat.
- Running practice sessions that are too long or too close.
- Expecting silence after one session.
- Leaving a parked vacuum in the room after cleaning.
- Introducing two new appliances in the same week.
When to Call Your Vet
Contact a veterinarian if barking at appliances is severe, if the dog injures itself lunging or chasing, if it refuses food, hides for a long time, or shows signs such as vomiting, diarrhea, or prolonged trembling after the noise ends. A veterinarian can check for pain, hearing problems, or other health contributors, and advise whether professional behavior support would help. This article gives general information only and is not a diagnosis. Sudden changes in hearing, balance, or behavior, or barking that appears suddenly in an older dog, also deserve a veterinary check, because a medical cause should be ruled out before training continues.
Pin This: Vacuum Calm Checklist
- Start with the vacuum off, still, and rewarded for calm sniffing.
- Add movement, then sound at a distance, in small steps.
- Practice two or three short sessions a week, never one long one.
- Settle the dog on a mat in another room during real cleaning.
- Offer a long-lasting chew or food puzzle while you vacuum.
- Vacuum after a walk, when the dog is already tired.
- Put the vacuum away when the job is done.
Frequently Asked Questions
Why does a Dachshund bark at the vacuum but not the television?
A vacuum combines loud noise, floor vibration, and unpredictable movement, while a television is a steady picture and sound from one place. The moving, noisy machine is a much stronger trigger for an alert breed.
Should I let the dog chase the vacuum to get used to it?
No. Chasing rehearses barking and lunging, and the dog can be hurt by the vacuum head or cord. Calm watching from a mat, at a distance, teaches the dog that the vacuum is boring.
How long does vacuum training usually take?
Many dogs show clear improvement within three to six weeks of short, regular sessions, but fearful dogs may need longer. Progress is measured in shorter barking and faster recovery, not instant silence.
Can I vacuum while the dog is in the same room?
Yes, once practice sessions show the dog can stay settled with a running vacuum nearby. Until then, use another room or a gated area, and keep sessions short.
What if the dog barks at every appliance, not just the vacuum?
Work on one appliance at a time, starting with the easiest, using the same off-first steps. Progress with one appliance usually makes the next one faster, because the dog learns the general lesson that household noises predict calm rewards.
Conclusion
Vacuum barking comes from noise, movement, and surprise, and it fades when the dog learns the machine is boring and predictable. Introduce appliances slowly, settle the dog on a mat during real cleaning, and keep sessions short and calm. Start the off-first introduction this week, and judge progress by shorter barking and faster settling across several weeks.




3 Comments